Cool, crisp cucumbers from the garden are perfect in summer salads or on their own with sour cream and fresh dill.
Types of Cucumbers
Standard cucumbers are often called slicers. Slicers are usually 6-9 inches (15-23 cm) long, but may be as short as four (10 cm) and as long as 14 (36 cm) inches. "Burpless" varieties have been bred to avoid a common side effect.
Pickling cukes are usually shorter (6 inches or 15 cm) and "blockier" than slicing cucumbers, and have a bumpy or spiny skin. They're also crunchier, which is why they're best for pickling. Some cucumber varieties are bred to be good for both slicing and pickling.
Gherkins are actually the fruits of the 'West Indian Gherkin' (Cucumis anguria), a close relative of the cucumber, which produces 1-3 inch long (25-76 mm) spiny fruits. Gherkins are grown just like cucumbers. Many pickles called "gherkins", however, are made from regular pickling varieties.
Round, yellow "lemon cucumbers" are about the size of a tennis ball. Lemon cucumbers are sweet and don't contain as much of the chemical that can make some cucumbers bitter. They also make colourful pickles.
English hothouse (also called Dutch or European) cucumbers have a ridged or smooth skin, virtually no seeds, and do not require peeling. As the name implies, they are usually grown in greenhouses. Japanese cucumbers, which are also long, slender, thin-skinned, and virtually seedless, are a good substitute.
Armenian cucumbers (Cucumis melo) are long and light green with thin, ridged skins that also don't need peeling. Asian cucumbers come in a wide variety of lengths, colours, and flavours.
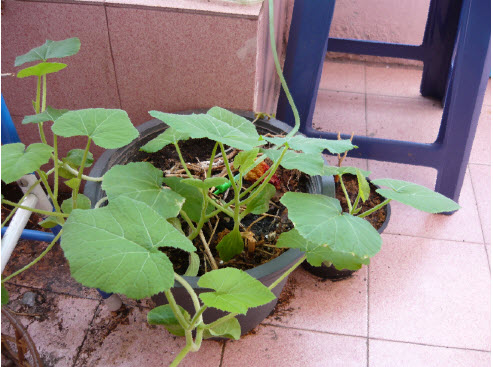
Planted in the pot picture
Tuesday, July 21, 2009
Sunday, May 24, 2009
Growing Strawberries
For those gardeners with little space but a hankering for homegrown strawberries, a strawberry pot is the perfect solution.Growing strawberries in a pot is simple and rewarding, and you can do it even if you don't have any yard to speak of. If you're unsure about what a strawberry pot is, they are those urn-shaped pots with a series of small pockets running along the sides. They are generally terracotta, though I've seen them made of glazed pottery as well. You can also find in a variety of sizes, from very small four-pocket varieties to pots that stand nearly two feet tall and have a plethora of pockets. They can be a bit pricey, but you can often find them on sale in home and garden centers in spring and even on end of season clearance in the fall. Choose a size that matches up with the number of berries you'd like to grow up.
Choosing Plants
There are three types of strawberry plants: June-bearing, ever-bearing, and day-neutral. For a strawberry pot, the best types are the ever-bearing and day-neutral varieties. They will provide you with a regular harvest from late spring until early fall. You'll get higher overall yields from day-neutral
Planting a strawberry pot is a fairly simple process
- Get the pot adequately moist. Terracotta pots will wick all of the water out of your soil unless you moisten them before planting. To do this, simply lay your pot in a tub of water for about an hour. It will soak up water so it won't suck it out of the soil later.
- Place a piece of window screening or broken flower pot over the drainage hole so the soil doesn't leak out.
- Fill with soil until you reach the lowest level of pockets. Insert your strawberry plants in these pockets, filling around them with soil. Make sure the crown of the plants is just above soil level.
- Insert either a one-inch PVC pipe drilled with holes along its length or a cardboard tube from wrapping paper near the center of the pot, but not directly over the drainage hole. You will be using this as a watering pipe to ensure that all of the pockets get adequate moisture.
- Continue filling to each level of pockets and inserting plants.
- Stop adding soil when you get to two inches below the rim of the pot. You can add three to four plants in the top of the container, and fill in with soil around them.
- Water everything in well. Pour water down the tube, on the soil at the top of the pot, and into each pocket (do this slowly so the water doesn't make the soil slosh out.)
- Place your pot in a spot that gets at least six hours of sun per day.
Ongoing Care
Basically, you'll be keeping your plants watered and fed for the remainder of the growing season. Test for moisture by sticking your finger into the potting soil up to your first knuckle. If it is dry, you'll need to water. Strawberries are shallow-rooted plants, and start to slow in fruit production if they are allowed to dry out. Fertilize your plants every other week with a diluted seaweed fertilizer to keep your plants producing. Harvest berries as soon as they are ripe, and remove any rotted fruit or yellowing leaves as you see them.
The type of soil you choose for your strawberry pot should be one that is high in organic matter. Any good, organic potting soil will work. Adding compost, peat, or leaf mold to the mix will make your plants even happier. Also, it's a good idea to mix some blood meal and bone meal into your mix before you plant. These will feed the plant and help them get off to a good start.
Strawberries are perennials, and will produce happily for years. If you want to overwinter them in the pot, you'll need to place the entire pot in a sheltered location such as an unheated garage. If you have some ground available to overwinter in, you can dig the plants out of the pot, place them in plastic pots, and bury these pots into the ground with their rims at soil level. Your plants will overwinter beautifully and you can revive them by potting them up with plenty of rich, fresh soil in the spring.
Subscribe to:
Posts (Atom)
